Showing posts with label Rimmel London. Show all posts

Thursday, 22 August 2013

Pinwheel nail art

Today's manicure is probably my favourite nail art I have ever done. I am so in love with it. I often ask the boyfriend what colour I should paint my nails, and he always give me the same answer, pulling out all the coral type colours out of my nail polish stash. So I thought I would try to do some nail art to incorporate all of the colours, just for him. Here is the outcome:


I started by prepping my nails with OPI's base coat. Then painted my nails using Barry M's 'matte white' polish.  I topped this off with a coat of SV and allowed to dry. Once this was dry I used four pieces of stripping tape per nail to divide my nail into eight sections; to create the pinwheel effect. I did one hand at a time, so before I started painting my nails again, I made sure all pieces of tape were sectioned off on one hand and the lids of all the polish were unscrewed.


The polishes I used:
 
The corals from dark to light:
 
Instyle coral - Rimmel London
Iisie Street - Nails Inc
Summer Fizz - Leighton Denny
Peach Melba - Barry M
 
The pinks from dark to light:
 
Miami - 17
Pink Flamingo - Barry M
Petite Pink - Sally Hansen
Strawberry Ice cream - Barry M


I painted each individual section with one colour starting from the darkest coral to the lightest, and continued the circle with the lightest pink to the darkest. On each nail I started the darkest coral in a different section so all the nails were different, which I think gives quite a nice effect.  


As soon as I had completed each nail, and before the nail polish was completely dry, I removed the tape and gave it a coat of SV, before I moved onto the next nail. I waited until all the nails on my left hand were completely dry before I started the process again for my right hand.


Once all ten fingernail were complete and dry, I applied another coat of OPI's base coat. Whilst the polish was still wet I used an orange stick to place a little diamond stud in the middle of the pinwheel and sealed in with another coat of SV to complete the look.


I shall definitely be giving this manicure another go in possibly cooler colours using blue/green tones or reds/browns for autumn.
 
What do you think? Will you be giving it a go?
 
Until next time...
 
Laura-Jane

Thursday, 11 April 2013

Surf's up...

I have recently been craving a holiday. For those of you who know me (or read my last post) it is one of the things in life I enjoy the most. Maybe it is because of the lack on sun here in the UK, the hectic workload, or the fact I just love holidays, but I really long to just get away and enjoy basking in the sunshine.
 
As I am waiting an operation date, a holiday doesn't look likely; so to satisfy my craving of the soft white sand, the radiating warmth of the sun on my skin and the gentle sound of crashing waves shimmering under the soft moonlight and stars, whilst taking an evening stroll on the beach, I have come up with this manicure.
 
 
To start, I painted my nails with two coats of 'Sweet as Sugar' by Rimmel London, then topped if off with Seche Vite's fast drying top coat.


Once the nails were dry, I could then start the fun bit by creating the wave detail. To do this I used some new nail polishes, which were a gift from my Mum. Unfortunately, they don't have nail polish names, which is a bit disappointing. As in my opinion, a good catchy name of a nail polish is half the fun of nail art. I used nail art fine liner polishes by a company called 'Fraulein'. I got a big box of them in an array of colours and chose the below to create my waves.


The waves are really simple to do. With a steady hand, create an arc shape and fill in with your main wave colour. Then, with different shades of blues, pearls and glitter, blend them together until you have the desired effect. Then top this off with another coat of Seche Vite and allow to dry.
 
 
Now, all that is left to do is to add the piece de resistance; the wave breaks. This is the most satisfying, as it really does complete the look. For this I used 'Matte White' by Barry M and a sponge.


The sponge I used was a great find. I bought it as part of a paint set just before Christmas, as I was making some salt dough Christmas decorations. The best bit is that the entire paint set, sponge included, was only £1! The little sponge is just the right size to create some great nail art effects and is also on a stick, which makes handling the tool so much easier. All you need to do is blob some white polish onto your work surface, then with the corner of the sponge, collect a tiny amount of polish, dab off the excess and sponge on the wave break, making sure you cover part of the wave too.
 
 
Allow to dry, and complete the look with yet another coat of Seche Vite fast drying top coat.
 
There you have it. A little bit of ocean on the tip of your fingers. It even makes me want to go surfing, although that sporting activity generally isn't on the top of my agenda when on a relaxing vacation.


April is also Autism awareness month, so the blue manicure ties in nicely (blue is the main colour of their cause). If you would like to read more about this cause, you can do so here.
 
What do you think?
 
Until next time...
 
Laura-Jane

Thursday, 28 March 2013

Easter Inspired Nail Art

I am sure most of your are looking forward to a nice long weekend, spending time with family and friends and munching on tons of chocolate. Well, that's what most people here in the UK tend to do. However, Easter is not just about the Easter Bunny, egg hunts and chocolate, it also has an important religious significance too, which you can read about here.

I have gone down the less traditional Catholic route to display my Easter festivities on my finger tips, and have gone for a multi-coloured, more modern take on Easter...


This has probably been the most adventurous nail art I have attempted, and without blowing my own trumpet, I think they have come off rather nicely. It took forever to do, and with a lot of patience, a steady hand, and a multitude of polishes and tools, I finally got there.

Here is what I used:


From left to right:

Black Taxi by Nails Inc
Pink by Nails Supreme
Silver glitter nail paint by Kiss
Blue nail paint by Kiss
Royal Indigo by 17
Strawberry by Barry M
Berry by Barry M
Matte White by Barry M
Lemon by Barry M
Sweet As Sugar by Rimmel London
 
Green nail paint by Kiss
Pink nail paint by Kiss
Miami by 17

The tools used:


I used dotting tools to apply the more intricate designs like the egg detail, eyes, small flicks. I used the paint brushes for the bigger designs such as the egg, Easter bunny and butterfly.

Let me introduce you to my little friends:

The pinky: A little Easter chick complete with bright orange beak and fluffy hair.


The ring finger: A speckled Easter egg just like the yummy little treats you get in packets of Cadbury's Mini Eggs. This nail art resembled an Easter egg hunt, and used grass detail to create this effect.


The middle finger: This one was probably the hardest to do, and as you can see is the character most associated with Easter now; the Easter Bunny.


The index finger: I gained inspiration for this one from my childhood, where every Easter at Primary School we had a competition to decorate your own egg with paints, glitter, sequins or any other crafts you could find. This was just a nail to have fun with, with dots, lines, zigzags, and just to add a bit of creativity.


The Thumb: This nail is not necessarily Easter related; more for the time of year. The butterfly resembles Spring, new life and growth. The silver body and antennas add a bit of sparkle to the design.


I don't tend to do different nail designs on each finger, I much prefer a more uniformed look, although I can sometimes be partial to the accent nail on the ring finger. However these designs have changed my opinion, as I do really like the look of them. They have received lots of compliments too, from both adults and children. I even got a comment today, saying "they were like little bits of art on your fingers", which of course I love to hear as I did put so much effort into creating them.

I think the colours together all tie in together and complement each other too.


To top off all the designs, I finally got to use my newly purchased bottle of Seche Vite fast drying top coat. I was super excited to use it when I purchased it, and I have to say it did not disappoint. I am going to put myself out there and keep with the religious theme and say it is the Holy Grail of top coats. This stuff is a-maz-ing! If you do not have a bottle, I suggest you pick yourself up some. I bought mine from Boots for £9.00, but I know you can get it cheaper on Amazon if you don't mind waiting the posting time.

Which one is your favourite?
Do you have any Easter nail art designs you want to share?

Until next time...

Laura-Jane

Thursday, 7 March 2013

Mother's Day Nail Art; because every Mother deserves flowers...

In the UK it is Mothering Sunday this weekend (I hope you have all planned something special!?) I don’t think there is a more perfect way to spoil your Mum and tell her how much you love her than a good old pampering session. So, instead of the usual box of chocolates or bunch of flowers, why not treat your Mum to a beautiful Mother’s Day inspired manicure…

 
To make it really special, you can go all out, pull out all the stops and give her a manicure experience to remember. First of all, set the ambiance and play some soothing background music, or something that you both like to listen to. Bathe hands in a homemade soak. This is basically a bowl of warm water that is filled deep enough to cover both hands once they have been submerged. You can add moisturising body wash to the mix, or can just add some scented oils to fill the room with a beautiful aroma, and to also soften the hands. Lavender is a good shout, which boasts lots of relaxation properties. Soak for around 10 minutes. Next up is a relaxing massage, place a large dollop of water based hand cream or moisturising oil (a thick hand cream will not work) and gently massage the hands up the forearm to the elbow, making sure you use circular motions and you don’t miss a spot, even get in between the fingers (I should also point out, that the removal of rings would be a good idea – should have actually mentioned that at the beginning, better late than never, eh?) A good hand massage should last around 10 minutes, longer if you want, I’m sure your Mum wouldn’t say no!
 
 
Once this has been done, the hands need to prepped and ready to paint; File nails to the desired shape and length, cleaned under the nail and also by wiping the nails with a cotton swab to rid it off any cream and natural oils, and a base coat (optional) is applied.
 
 
Nail polishes used:
 
 
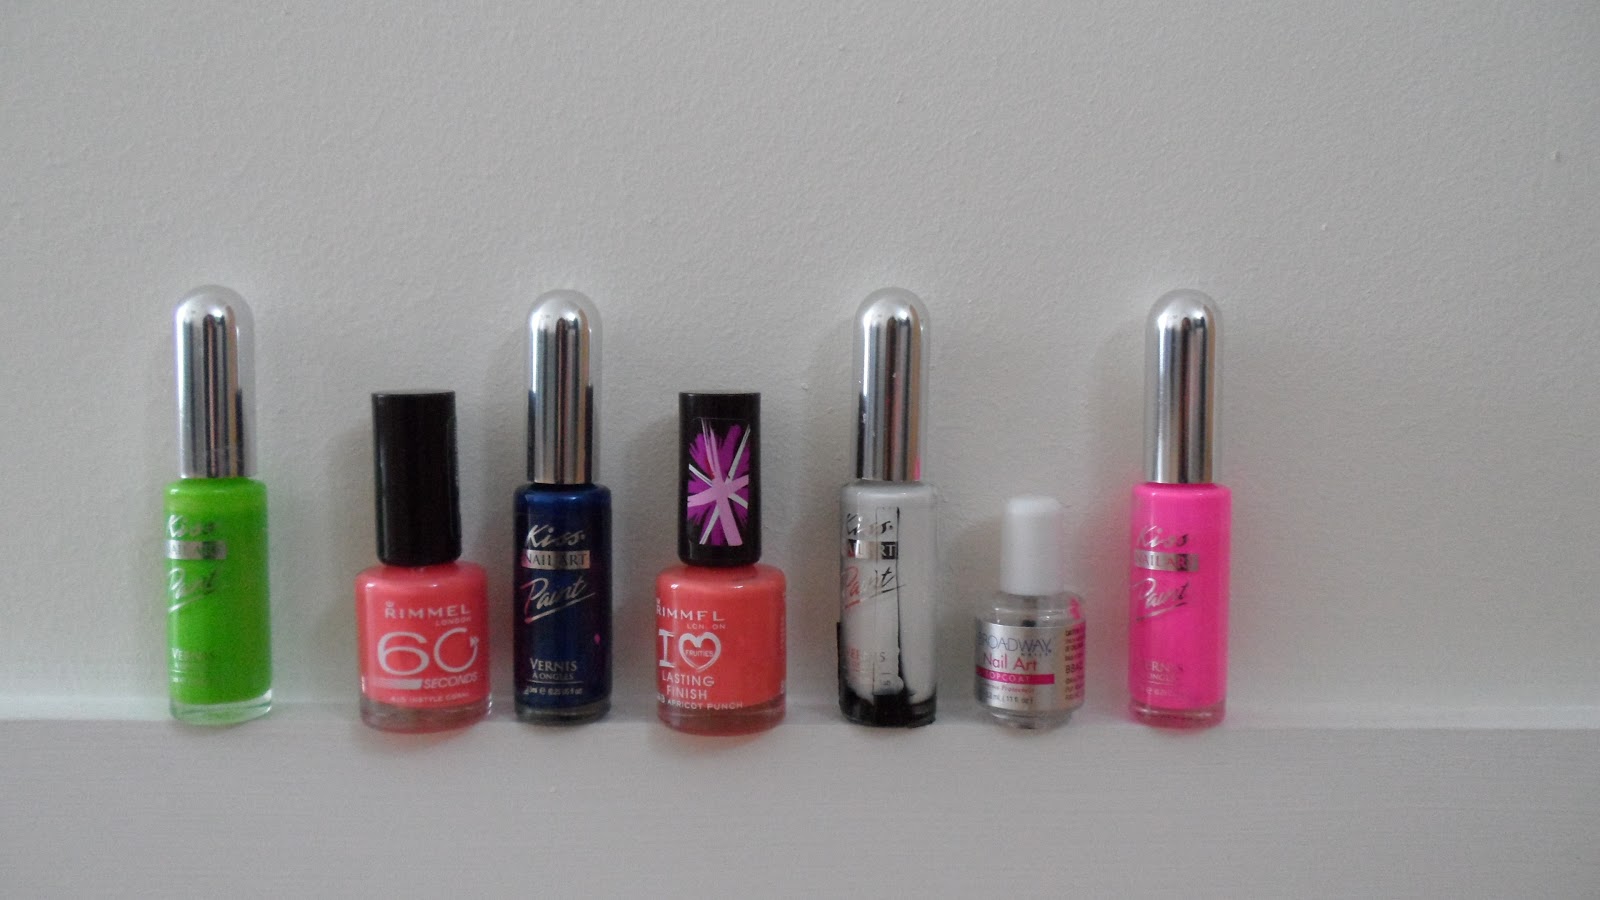
Choose your base colour, I have gone for one coat of 'Apricot Punch' and one coat of 'Instyle Coral' both by Rimmel London. When applied together, they mix well to create a nice peachy coral colour. I like to use nail polish brands that just allow me to apply one coat of polish, two if required, but that is my maximum. Once dry, tip the nail with the white polish. I used white nail art polish by 'Kiss', which has a very thin application brush. Let this dry.
 
 
Now comes the fun part. Pick two complimentary colours to use for your flowers; one for the petals, and the other for the centre. For this design, I have chosen the pink and blue nail art polish by 'Kiss'. Paint four to five petals (I always do all the petals first on all fingers, so I don’t have to change the polish) and then place a dot in the centre to complete your flower. To finish it off, add a touch of green to resemble leaves and/or a steam. Always add a top coat of clear polish to seal in your art work and give it that extra sparkle. This also makes the whole manicure come together and somehow blends the polishes to make it look complete.
 
 
There you go, a beautiful manicure and one very happy Mummy! Or if you have done it for yourself, a very happy YOU!
 
 
What are you going to do for your Mum this Mother’s Day?
 
 
Let me know what you think of the design, and if you shall be giving it a go.
 
 
Until next time… 
 
 
Laura-Jane

Friday, 15 February 2013

Diamonds are a girl's best friend...

The sun has been shining in London today, and it is the first warm(ish) day I can remember in a long time; hence the new coral coloured nails; which is perfect for spring. I like to call this design a French manicure with a modern twist, with a bit of sparkle to finish it off.


Nail polishes used:


Peach Melba (381) by Barry M
Coral (415) by Rimmel London
Kiss Nail Art Paint in White
Albert Bridge top coat by Nails Inc

How to get the look:

I used one coat of the Peach Melba by Barry M, which I then let dry. I like to paint all ten fingernails, and by this time I find the first nail I painted is dry enough to do the next step. I then used the Rimmel London Coral polish to add the tip, using a very thin coat. To separate the two colours, I swiped across the fingernail with the white Kiss nail art paint (I was planning on using a glittery gold, but I didn't have any in my collection). To add the piece de resistance, I used an orange stick to place a small rhinestone in the middle of the white strip. The rhinestones used were by a company called 'Cheeky'.


I didn't use any glue, just placed it on wet nail varnish and completed the look with one coat of Albert Bridge Top Coat by Nails Inc to seal it together and get that lasting shine. There you have it, very simple to do, but looks rather elegant and a sure way for compliments to come flooding in. The rhinestones make it that extra special, and after all, diamonds really are a girl's best friend!


Who's going to give it a go? Let me know what you think, and if you give it a try, make sure you leave a link in the comment box below.

Until next time...

Laura-Jane